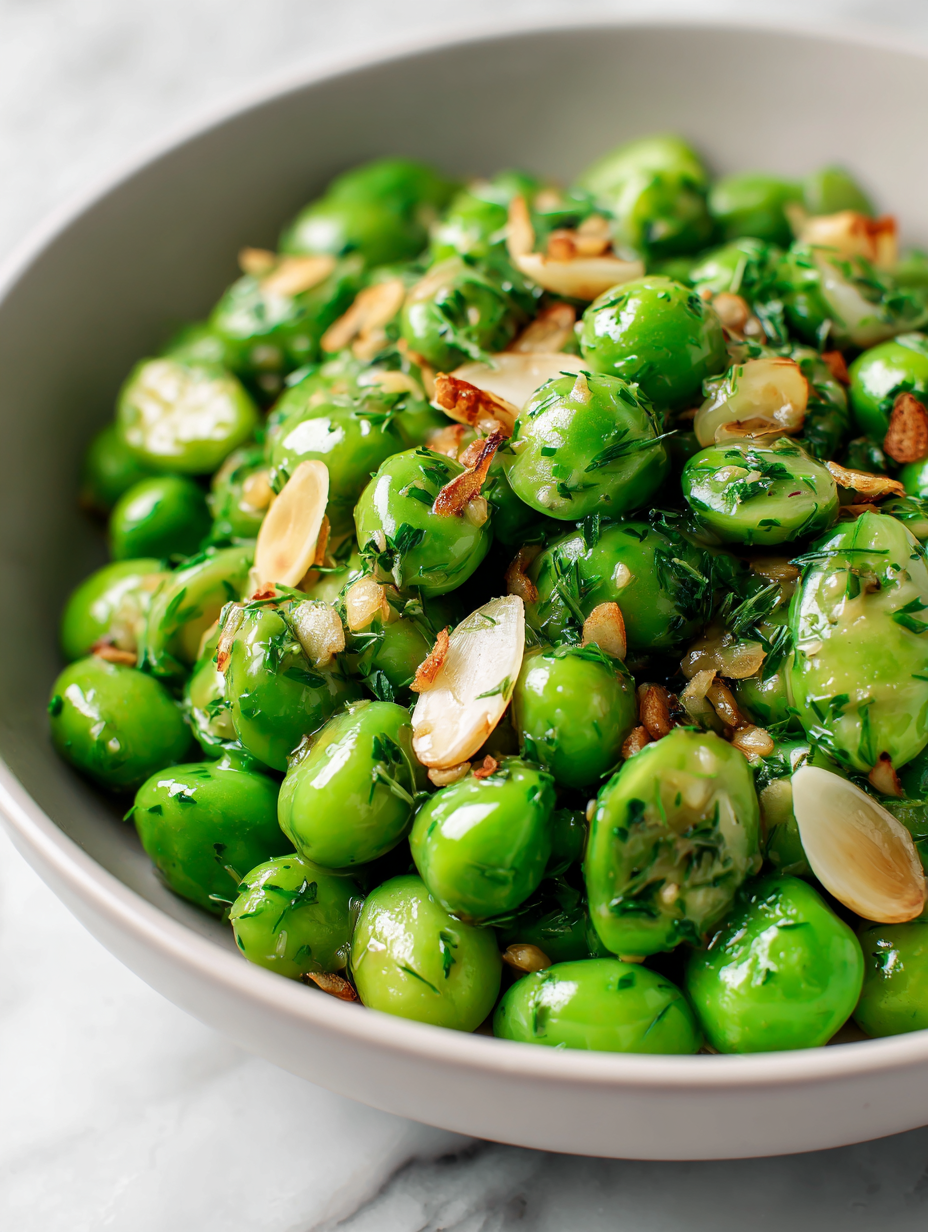
Sometimes, the simplest ingredients tell the most honest stories. This butter garlic peas recipe is a testament to that. It’s not about fancy tricks, but about coaxing flavor from humble, everyday peas and turning them into something unexpectedly rich and fragrant. A little butter, a punch of garlic, and you’re set for a side that feels like a small celebration of simplicity.
There’s a quiet satisfaction in transforming a handful of frozen peas into a dish that smells like childhood comfort and feels like a little culinary victory. It’s quick, unpretentious, and perfect for those nights when you want something cozy without fuss. Honestly, it’s the kind of dish that makes you appreciate the small things—like the way garlic sizzles and turns golden or how peas pop softly in the pan, releasing their bright, sweet aroma.
Focusing on the overlooked charm of simple ingredients—elevating everyday peas with rich butter and fragrant garlic, turning a humble side into a memorable, comforting dish.
The story behind this recipe
- This recipe came together one evening after I realized how peas, when cooked simply with butter and garlic, can transform from a side into a little revelation. I was craving something quick but flavorful, and this dish just happened. It’s funny how a handful of frozen peas can become the star with a few honest touches—no fancy ingredients needed, just good technique and a bit of patience to let the garlic toast up perfectly.
- I remember the first time I made this for friends, and their surprised faces when I told them what was on their plate. It’s become a quick go-to for me—something I make when I want comfort that’s bright and fresh, but also rich and satisfying. There’s an unspoken joy in that simple sizzle, the smell of garlic turning golden, and the way the peas burst softly with each bite, releasing their sweet, grassy scent.
- heading
- story_type
Key ingredients and tips
- Frozen peas: I love how they pop with a burst of sweetness when heated, but if you want a fresher flavor, try fresh peas—though they take a tad longer to cook and need blanching first.
- Butter: I prefer unsalted for control over salt, but salted butter adds a richer, more complex flavor if you’re feeling indulgent. Keep an eye on the heat to prevent browning too fast.
- Garlic: I use plenty because it’s the core aroma that fills the kitchen, but if you’re sensitive, start with half a clove minced fine—garlic can turn bitter if overcooked.
- Olive oil: Just a splash helps the garlic sizzle evenly and prevents sticking, but if you want a cleaner taste, skip it and go straight to butter—your call on that smoky note.
- Lemon juice (optional): Brightens the dish with a zesty kick, especially good if your peas are on the sweeter side. Skip if you prefer a milder, creamier finish.
- Salt & pepper: Always taste as you go; a pinch of sea salt and fresh cracked pepper really elevates the natural sweetness of the peas, but be cautious not to overdo it early on.
- Red pepper flakes (optional): A tiny pinch adds a subtle heat that contrasts beautifully with the sweet peas and buttery richness—use sparingly, or skip for a milder version.
Spotlight on key ingredients
Butter garlic peas:
- Frozen peas: I love how they pop with a burst of sweetness when heated, but if you want a fresher flavor, try fresh peas—though they take a tad longer to cook and need blanching first.
- Butter: I prefer unsalted for control over salt, but salted butter adds a richer, more complex flavor if you’re feeling indulgent. Keep an eye on the heat to prevent browning too fast.
- Garlic: I use plenty because it’s the core aroma that fills the kitchen, but if you’re sensitive, start with half a clove minced fine—garlic can turn bitter if overcooked.
Notes for ingredient swaps
- Dairy-Free: Swap butter for coconut oil or a dairy-free margarine. You’ll miss some richness but keep the fragrant base.
- Vegan: Use olive oil instead of butter. It’ll add a slightly different flavor, less creamy but still delicious.
- Fresh Peas: If you have fresh peas, blanch them first for 2-3 minutes in boiling water, then drain and add to the pan. They’ll be a bit sweeter and more tender.
- Garlic: If fresh garlic isn’t available, roasted garlic paste or garlic powder can work, but they won’t have that bright, pungent punch.
- Lemon Juice: Use lime juice or a splash of vinegar for acidity if lemon isn’t on hand. It brightens the dish without the citrus note.
- Salt & Pepper: Sea salt or kosher salt can be used interchangeably, but adjust the amount accordingly for flavor. Freshly cracked pepper is always best for a vibrant bite.
- Red Pepper Flakes: Use smoked paprika or a pinch of cayenne for a different kind of heat or smoky flavor, depending on your preference.
Equipment & Tools
- Large skillet: For even heat and easy stirring.
- Spatula: To stir and combine ingredients gently.
- Measuring spoon: To measure butter and seasonings accurately.
- Knife: For mincing garlic.
Step-by-step guide to butter garlic peas
- Equipment & Tools: Get a large skillet, a spatula, a measuring spoon, and a knife. The skillet is for even heat and perfect garlic toast. Spatula for gentle stirring, and a knife for mincing garlic.
- Heat your skillet over medium heat (about 160°C/320°F). Add 2 tablespoons of butter, letting it melt and foam for 30 seconds. You want it shimmering, not browned.
- Toss in 3-4 minced garlic cloves. Stir immediately and cook for about 30 seconds until fragrant—avoid browning, which turns bitter. The garlic should turn golden and smell nutty.
- Add 1 cup of frozen peas directly to the skillet. Stir to coat peas evenly in butter and garlic. Cook for about 2-3 minutes until peas are heated through and start to pop.
- Check the peas: They should be bright green and tender but still hold their shape. If they look dull or are mushy, turn down the heat and cook a bit longer. If they stay hard, give them more time.
- Season with a pinch of salt, freshly cracked pepper, and a squeeze of lemon juice if desired. Stir well to distribute flavors. Taste and adjust seasoning as needed.
- Remove from heat. Let sit for a minute for flavors to meld. Plate immediately, garnishing with extra garlic or herbs if you like. Serve warm.
- Resting & Finishing: Rest for 1 minute—peaks of flavor settle, and the butter coating thickens slightly. Plate in shallow bowls or on a small platter. Serve as a side or toss into pasta or grains.
- Checkpoints & How to Know It’s Done: The peas are bright and tender, with a slight pop; the garlic is golden and aromatic; the butter sauce is glossy and coats evenly.
Let the dish rest for a minute to deepen flavors. Serve immediately, garnished with extra garlic or herbs if desired. The butter will firm up slightly, creating a rich, velvety coating that elevates simple peas into a cozy, fragrant side.
How to Know It’s Done
- Peas are bright green and tender with a slight pop.
- Garlic is golden and fragrant, not bitter or burnt.
- Butter sauce is glossy and coats the peas evenly.
Butter Garlic Peas
Ingredients
Equipment
Method
- Start by heating your large skillet over medium heat until warm.
- Add the butter to the skillet, allowing it to melt and shimmer gently. You’ll hear a soft sizzling sound as it coats the pan.
- Toss in the minced garlic and stir quickly. Cook for about 30 seconds until fragrant and golden, but be careful not to let it burn—this keeps the aroma bright and nutty.
- Add the frozen peas directly into the skillet. Stir well to coat them with the garlic butter mixture. Cook for 2-3 minutes, until the peas are heated through and start to pop softly, releasing a sweet aroma and vibrant green color.
- Season with a pinch of salt and freshly cracked pepper. Squeeze in a little lemon juice if you like a bright, tangy note. Stir everything together and cook for another minute to meld the flavors.
- Remove from heat and let sit for a minute. The sauce will thicken slightly, coating the peas with a glossy, fragrant layer. Serve immediately as a cozy, flavorful side dish.
Tips and tricks for perfect peas
- Bolded garlic: Keep an eye on the garlic as it sizzles; remove from heat once it turns golden to prevent bitterness.
- Bright peas: Add peas directly from frozen; they’ll retain more color and sweetness if not thawed first.
- Creamy coating: Don’t rush stirring after adding butter; give it a moment to emulsify for a velvety finish.
- Flavor boost: Finish with a squeeze of lemon or a pinch of red pepper flakes for extra dimension and brightness.
- Pan temperature: Keep the heat moderate (around 160°C/320°F) to avoid burning garlic and overcooking peas.
- Taste before seasoning: Peas can be salty; taste first before adding extra salt to avoid oversalting.
- Rest briefly: Let the dish sit for a minute after cooking; the flavors deepen and the butter thickens slightly.
Common mistakes and how to fix them
- FORGOT to watch heat; high heat burns garlic—lower if necessary.
- DUMPED peas directly into hot pan; defrost first for even cooking.
- OVER-TORCHED garlic; remove early if it turns dark to prevent bitterness.
- SALT too early; add towards the end to avoid toughening peas.
Quick fixes and pantry swaps
- If the garlic burns, splash a little water and stir quickly to cool down.
- When peas seem dull, toss in a pinch of sugar to brighten their natural sweetness.
- DUMPED peas into hot oil—defrost first to prevent sogginess and uneven cooking.
- Splash a few drops of lemon juice if the peas stick or taste flat during cooking.
- Shield the garlic from direct heat with the back of a spoon if it starts to brown too fast.
Prep, store, and reheat tips
- Prep the peas: Measure and portion frozen peas ahead; they keep well in the freezer for up to 3 months, saving time when you cook. The bright green color and sweet aroma stay intact.
- Mince garlic in advance and store in a small airtight container in the fridge; it stays fresh for 2-3 days and releases a fragrant, pungent aroma when cooked.
- Cook and melt butter ahead; keep it in a sealed jar in the fridge for up to a week. Reheat gently to restore its silky texture and warm aroma.
- Reheating leftovers: Warm slowly over low heat, stirring frequently until the peas are heated through and smell sweet and fragrant again. Expect a slightly firmer texture but still vibrant flavor.
- Flavor changes: The dish may mellow slightly after refrigeration; a fresh squeeze of lemon or a quick re-toss in butter can revive brightness and aroma before serving.
Top questions about butter garlic peas
1. Can I use fresh peas instead of frozen?
Use frozen peas directly from the freezer—no need to thaw. They cook quickly, popping with a sweet aroma when heated.
2. How do I adapt the recipe for fresh peas?
Yes, but blanch fresh peas in boiling water for 2-3 minutes first, then drain before adding to the pan. They’ll be sweeter and more tender.
3. When should I add the garlic?
Add garlic in the last 30 seconds of cooking until it’s golden and fragrant. Burnt garlic turns bitter and ruins the flavor.
4. Can I make this vegan or dairy-free?
Yes, you can substitute olive oil for butter. It will add a slightly different, fruitier flavor but still work well.
5. Is lemon juice necessary?
A squeeze of fresh lemon juice brightens the dish and balances the richness of butter. Lime or vinegar can work in a pinch.
6. How can I add some spice?
Add a pinch of red pepper flakes if you like a hint of heat. Start small—you can always add more for a spicy kick.
7. How do I know when it’s done?
Cook the peas until bright green and tender, about 2-3 minutes. The garlic should be golden and fragrant, not burnt. The butter should look glossy and coat the peas evenly.
8. What if I overcook the garlic or peas?
If garlic starts to turn dark, remove it immediately to prevent bitterness. If peas aren’t tender, cook a minute longer, but don’t overdo it.
9. Can I prepare this dish ahead of time?
Perfect for prepping ahead: mince garlic, measure peas, and melt butter in advance. Keep everything refrigerated and reheat gently before serving.
10. How do I fix reheated peas that look dull?
If peas look dull or dry upon reheating, add a splash of water or lemon juice and stir over low heat until warmed through and fragrant again.
This butter garlic peas recipe might seem simple, but it’s a quiet reminder that good flavor often comes from honest, humble ingredients. The way the garlic mellows and the peas pop with sweetness makes it a dish you return to, especially when you need a quick, satisfying side. It’s one of those recipes that feels like a small, personal victory in the kitchen.
In the end, it’s about appreciating the little moments—those golden garlic sizzles and the bright burst of peas. No matter the season, this dish offers a comforting, fresh flavor that’s easy to adapt and even easier to love. Sometimes, the simplest things turn out to be the most memorable.

Hi, I’m Isabella Cury, the creator behind Elevating Simple. Food has always been my passion, but it’s not just about creating meals—it’s about taking everyday ingredients and transforming them into something extraordinary.
My journey in the culinary world has been a blend of education, dedication, and a deep love for sharing food with others. Through this blog, I aim to inspire people to find joy in simple, flavorful cooking.


